Tag Archives: Keep Your Change

Adventures in Gardening {Part 3: Planting a Square Foot Garden}

14 May

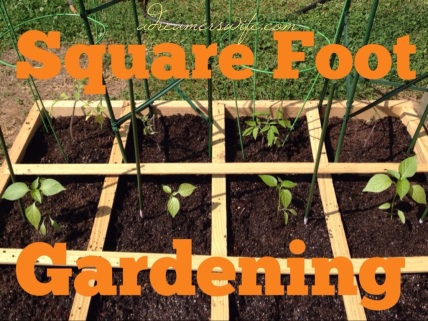
Square Foot Gardening

To catch up on my gardening experiment, read Part 1: Starting Seeds Indoors and Part 2: Building a Raised Bed.

Fortunately, last weekend I had time to transplant my seedlings into the raised bed! My grids for the square foot garden were already laid out, so it made spacing very easy. Mel Bartholomew came up with this method of garden and I’ve done so much research on square foot gardening, I feel like I’ve read his books, even though I haven’t!

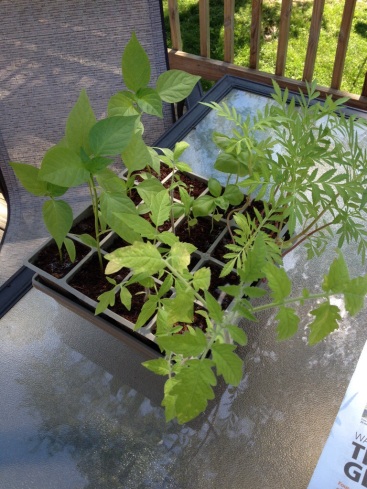
20140514-220303.jpgMy precious little plants waiting to move to their new home!

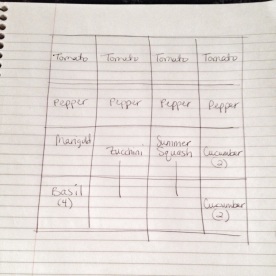
One of the things that everyone says to do in advance is chart out where you want to place your plants in the box. Taller plants should go on the north-side of the garden and smaller plants on the south-side so they aren’t competing for sunshine. I also found that certain plants are “companion” plants and others don’t like to be near each other. For example, I had to be sure to plant my basil away from my cucumbers, because apparently they don’t like strong smelling herbs. Tomatoes, peppers, basil, and marigolds all do really well together.

Here is my plan on paper:

20140514-215509.jpg

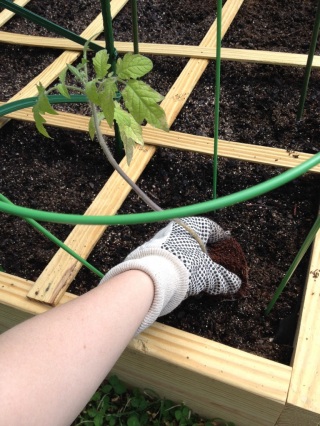
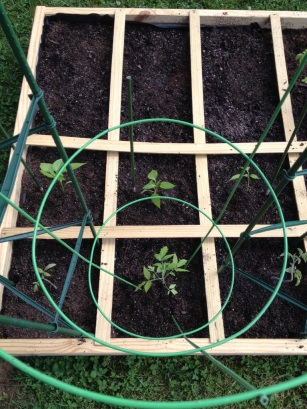
I planted extra tomato and pepper plants in case squirrels try to be sneaky with my food!

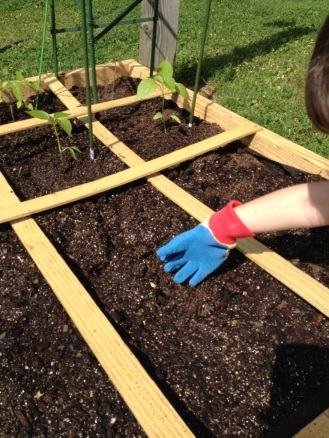
20140514-215622.jpgWow, I majorly need some sun! Sorry if my arm is blinding you!

I put in stakes and cages prior to planting, as recommended online so as not to damage the roots.

20140514-220016.jpg

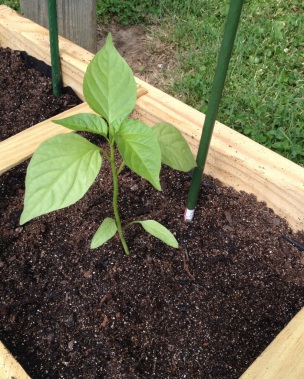
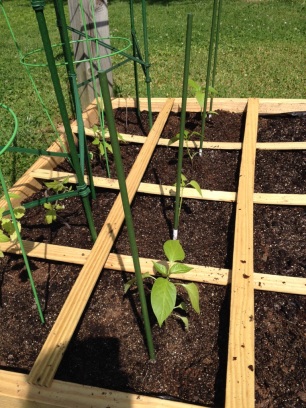
20140514-215751.jpgMy pepper plants have been doing so well so far. I hope they continue on like this!! Grow, grow!

20140514-215722.jpg

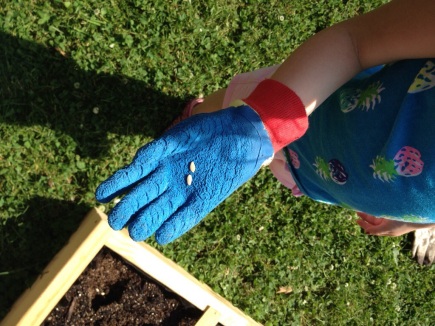
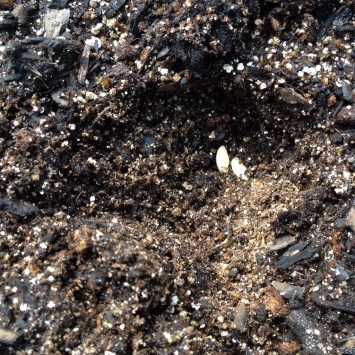
My girls helped me directly sow the zucchini, squash, and cucumber seeds. We had a good bit of rain on Wednesday and most of the cucumber plants have sprouted already! Now, I’m going to have to figure out how to trellis these guys to grow vertically so they don’t take over my garden!

20140514-220104.jpg

20140514-215925.jpg

20140514-215808.jpg

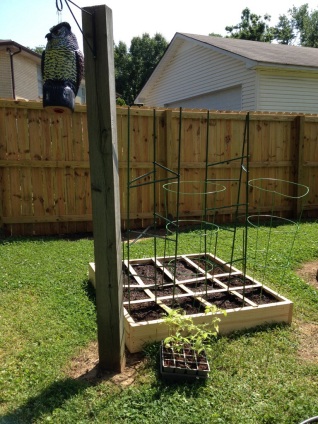
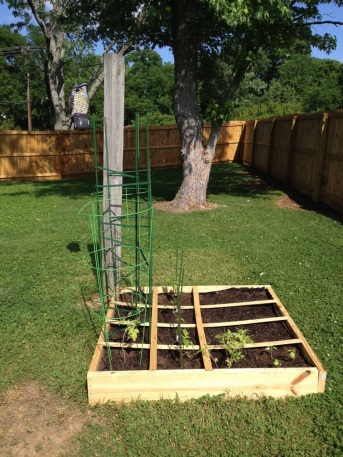
And here is my plan made 100% reality in my little 4×4 square foot garden:

20140514-215951.jpg

Hopefully, my guardian owl will scare little critters away!

20140514-215938.jpg

I can’t wait for these plants to start producing fruit and vegetables! Now I need to research how to harvest!

 Anybody else out there gardening this year (or has in the past)? What vegetables or fruits have you had the most success growing?

Adventures in Gardening {Part 2: Building a Raised Bed}

8 May

20140508-211502.jpg

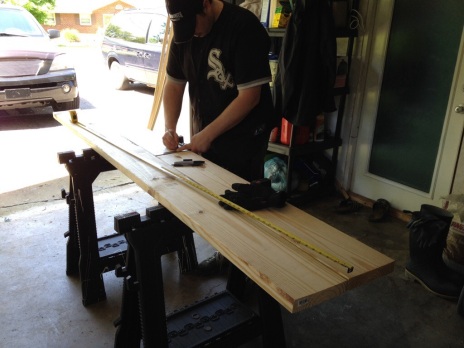
The last official frost date for Tennessee was April 30th, so that means that my little seedlings that I started indoors need to be transplanted! Last Sunday, my husband built the 4 x 4 raised bed and I prepared the soil. Unfortunately, I ran out of time to actually plant the seeds and seedlings but I’m trying to work on that this weekend as long as it doesn’t storm the whole time!

Please note: I am a first-time gardener! I’ve done a lot of research, but I’m obviously learning quite a bit as I go along. If you have any tips, feel free to share!

Here is a little overview of this step in my gardening adventure:

20140508-211130.jpgAdam bought some non-treated lumber to build my 6″ high bed. It cost about $16 for the materials.

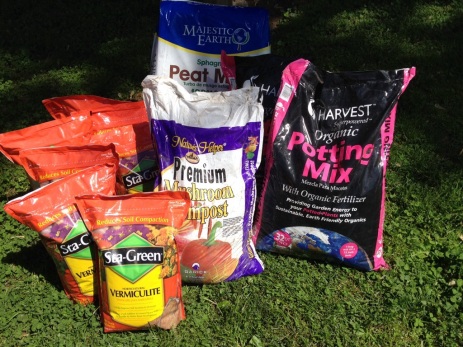
20140508-211147.jpgThis is what I used for my soil. (WARNING – Don’t buy the red bags… read on for why.) Mel Bartholomew, the creator of Square Foot Gardening, advises a mix of 1/3 Coarse Vermiculite, 1/3 Sphagnum Peat Moss, and 1/3 Blended Compost.  I didn’t pay attention to the grade of vermiculite and was just happy that I found some at Lowe’s, so these red bags actually consist of fine-grade vermiculite. I had already mixed it before realizing the necessity of coarse vermiculite. We’ll see what happens this summer with the plants… I spent about $60 to create the soil mix. (Oh, and there is a special square foot gardening soil available, but I would have had to spend double just to ship the darn bags because they weren’t available in any of the Home Depot stores in Middle Tennessee. You may be one of the lucky ones that lives near a store that carries it, though! The cost of the pre-made soil is about the same as mixing it yourself.)


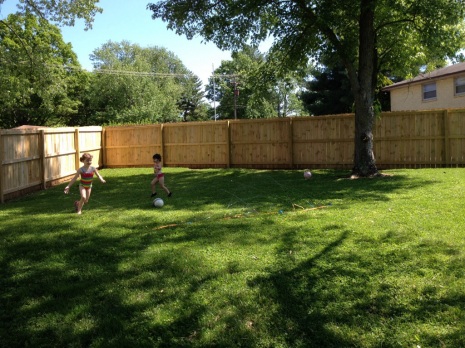
20140508-211205.jpgIt was such a beautiful day! The girls played in the sprinkler while we worked!


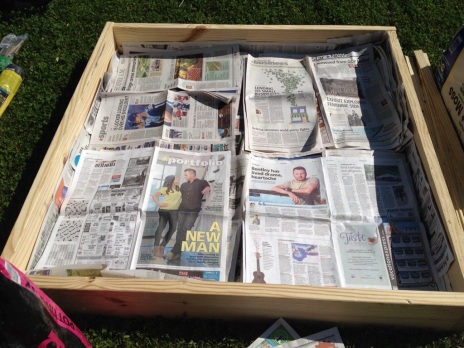
20140508-211230.jpgI read somewhere online that newspapers could be laid down in the yard as opposed to clearing out all of the grass first. (Can you tell we live in Nashville by the newspaper photos – Titans coach, David Nail, Dierks Bentley?) One of the strong points of building a raised bed is that it is supposed to be free of weeds! I’m all about less hassle gardening!


20140508-211251.jpgTo help minimize the chance of weeds, I put down some weed block over the newspaper. It cost about $10 for a roll. Also pictured above, are the three types of soil needed for a successful square foot garden! The only thing that will need to be replaced each year is the compost (as long as my fine vermiculite works out okay – fingers crossed)! Oh, and if anyone needs organic peat moss let me know! It was compressed and doubled in size once opened, so I have a ton left over!


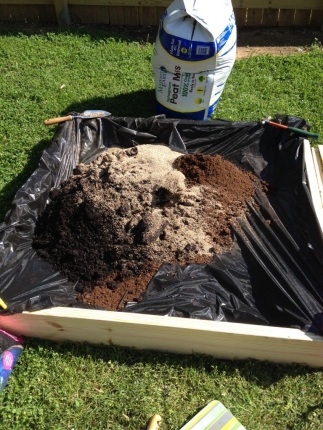
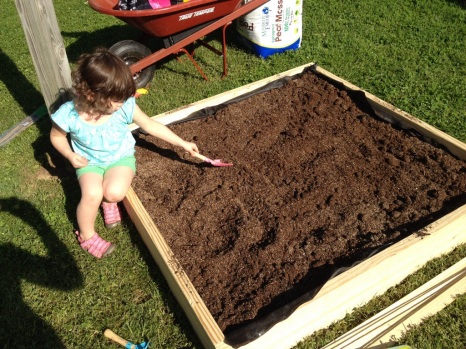
20140508-211322.jpgHere is all of the soil mixed together! My youngest wanted to help too! It basically looks like a big sandbox, so what kid wouldn’t?!

A 4×4 bed is supposed to hold about 7.5 cubic feet (2.5 cubic ft of each potting soil element). I still have some room in my box, so I’m thinking about trying to find some coarse vermiculite and to add with a little more compost and peat moss.


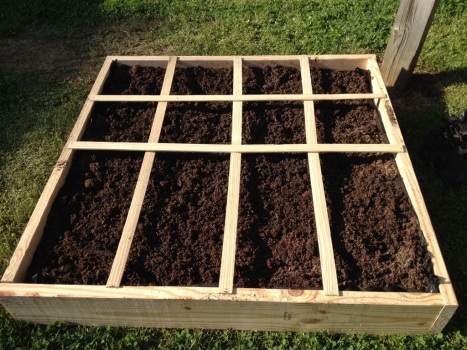
20140508-211418.jpgI nailed plywood down to make 12″ grids, which is a highly recommended part of square foot gardening. I purposely left one marker off, because two of my squash plants will take up the space of two squares instead of one.


20140508-211434.jpgHere are my seedlings hardening off outside and patiently waiting to be planted… they’re still waiting! I had too many long days at work this week and not enough time to plant! My tomato plants, especially, are dying to be transplanted!


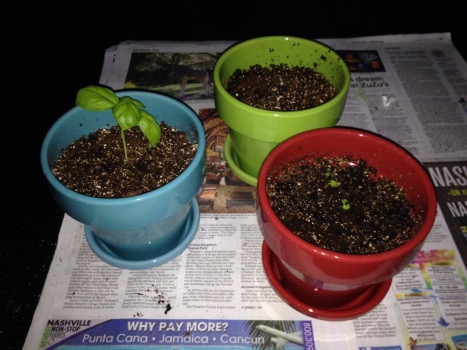
20140508-211446.jpgI did manage to transplant a basil plant and a tiny mint plant to these two front containers. As you can see it’s dark outside in this photo! I finished with a few minutes of daylight left Sunday night! I planted parsley in the back green pot. It’s supposedly really hard to germinate and grow from seed, so we’ll see. It doesn’t hurt to try!

I’ll be posting Part 3 of this series soon! If you missed the first step in this adventure, read Part 1: Starting Seeds Indoors.

Adventures in Gardening {Part 1: Starting Seeds Indoors}

15 Mar

Starting Seeds Indoors

My long-time dream of starting a vegetable garden is underway! As my (almost) three-year-old likes to say, “We’re making a kindergarten!”

After doing A LOT of research on raised beds, square foot gardening, and vegetables, I now know Nashville’s last frost date (April 30th) and terms such as “germination”, “thinning out”, “hardening off”, and “damping off”! I may know how to talk a good gardening game now, but given my track record with plants, growing a successful garden is going to be very challenging! Let’s just say that I  have fake flowers in the nice planter on my office desk because someone *ahem* did not water the real plant very frequently. Even the dog’s dish gets a little too low on water sometimes!

I’m taking a huge risk in documenting my gardening adventures! I may fail miserably or this underdog could prove that anyone can start a garden! Today, I’m posting about our first step in growing organic vegetables – starting seeds indoors!

First of all, here are a few reasons to start certain seeds indoors instead of directly sowing them into the garden bed:

1. It’s cheaper to buy seeds than transplants.
2. Plants are often healthier when started from seedlings.
3. It’s a way to get a head-start before the official frost-free date for an earlier harvest!
4. The kids can watch the seedlings sprout!

seedsnow.com seeds

At the end of last week, my Non-GMO seeds arrived in the mail from SeedsNow.com! I researched a few different seed catalogs online, but settled on SeedsNow since they sold $.99 sampler packs of 100% Non-GMO seeds and these non-hybrid seeds can be used from these plants after harvest in future years.  I’m only planting a 4×4 raised bed and couple containers of herbs, so I knew I didn’t need to spend extra money on a packet of 300 seeds. I spent about $10 on 10 different kinds of seed packets.

Burpee Self-Waterking Kit and SeedsNow.com seeds

I bought a self-watering seed starting kit to start growing my tomato, pepper, basil, mint, and marigold seeds indoors. Some of the other vegetable seeds can, and should, be planted directly in the ground once any risk of frost is gone. Seeds can be started indoors using yogurt containers and egg cartons, but given my poor watering habits, I figured anything that can help me consistently water my little seedlings would be a smart move! I need all the odds in my favor that I can get. This Burpee kit cost just under $12 at Home Depot.

Burpee Self-Watering System

This kit comes with a tray with seed-starting pellets, a watering mat, another tray to hold the water, a germination cover, and a paper  grid to keep track of where seeds are planted.

Pellets in Tray

Here’s a close-up of the pellets that will expand when water is added. I bought an XL cell kit, because I knew that the tomato plants needed room to grow, so I thought I might be able to avoid transitioning them into bigger containers prior to planting them outdoors in the raised bed. We’ll see…

Girls watering pellets

I let the girls use their new watering cans to add water to the pellets. They expanded quickly! (What you don’t see in this picture is the huge puddle of water at my feet after Little A energetically dumped all of the water out of her can. After quickly wiping her chair down, we tried it again!)

Seeds planted in tray indoors

Here is a close up of my tray after all of the seeds were planted in their cells. I used a pencil to create little holes for the seeds. I then added two seeds to each hole. (Let me tell you that mint seeds are nearly impossible to pick up – even with tweezers I had a hard time!) I made these nice, easy little popsicle stick labels before remembering that I would need to put the germination sheet on top!
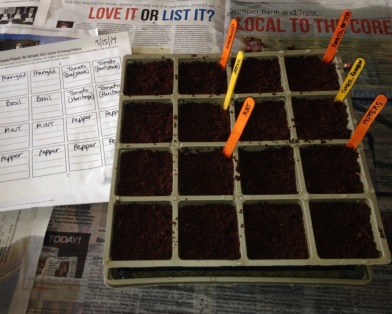
seed tray

I used this handy plant-o-gram sheet that was included in the kit to keep track of where I planted everything, though!

Seed Tray with Germination Sheet

To help the seeds germinate and sprout, warm soil is needed. I used an inexpensive tip from another website that suggested putting a heating pad in between two towels on a cookie sheet to create a heat mat. I really didn’t want to purchase an expensive seed heating mat and thermostat to be used for only 1-2 weeks. We make sure to turn off the heating pad at night and when we’re out of the house.

Once sprouts come out of the soil, I will move the tray to a sunny window where we get lots of direct light. The germination sheet will no longer be needed!

The next post will be an update on how the seedlings are doing and what my plans are for the layout of our garden! If you are a gardener, feel free to leave any tips that you have!

~

Keep Your Change

This has been part of my Keep Your Change series. For more money-saving posts, click here!


10 Inspirational Kindle Books Under $5!

7 Oct

Keep Your Change

This is part of my Keep Your Change series! For more money-saving posts, click here!

This past weekend, I noticed that some great Kindle books are discounted right now on Amazon! Some of them have been on my wish list, some are by authors I love, and all look like they’d be really good! I haven’t read any of these – yet, but I have a few downloaded and ready to go. I just thought I’d share in case you’d like to snag a couple of these for yourself while they are on sale!

1. One Thousand Gifts: A Dare to Live Fully Right Where You Are by Ann Voskamp
This book was recommended to me by Patty of Tales of Me and The Husband. I’m excited to check it out soon! The companion devotional is under $3.

2. Love & Respect: The Love She Most Desires; The Respect He Desperately Needs by Dr. Emerson Eggerichs
I’ve heard good things about this book, but haven’t read it yet. I think it is kind of a marriage must-read.

3. Led by Faith by Immaculee Ilibagiza
I’ve read Immaculee’s book Left to Tell about surviving the Rwandan genocide and it was life-changing, so I’m sure this one is amazing, too!

4. Running for My Life: One Lost Boy’s Journey from the Killing Fields of Sudan to the Olympic Games by Lopez Lomong
I ran across this book last week and was pleasantly surprised when I read that Lomong is a devout Catholic. I can’t wait to read about his journey!

5. Waking the Dead: The Glory of a Heart Fully Alive by John Eldredge
I loved Captivating and I’m a big John Eldredge fan, so I’m excited that this is discounted for the month of October. This will be good for my husband!

6. Unglued: Making Wise Choices in the Midst of Raw Emotions by Lysa TerKeurst.
I love how Lysa writes! Her 60-day companion devotional is also majorly on sale right now.

7. What Women Fear: Walking in Faith that Transforms by Angie Smith
I have a good friend who recommended this book to me, and it has been sitting on my wish list. It’s probably about time I checked it out!

8. God Has a Plan for Your Life: The Discovery that Makes All the Difference by Charles F. Stanley 
Anything that talks about God and having a plan for my life has my attention! I’m constantly on the look out for books like this!

9. Plan B: What Do You Do When God Doesn’t Show Up the Way You Thought He Would? by Pete Wilson
This sounds interesting to me. It would probably have some good insights to meditate on. I think we could all probably relate to this in one way or another.

10. Our Lady of Kibeho: Mary Speaks to the World from the Heart of Africa by Immaculee Ilibagiza
Another book by Immaculee under $5 – Awesome! According to the book description on Amazon, “Thirteen years before the bloody 1994 genocide that swept across Rwanda and left more than a million people dead, the Virgin Mary and Jesus Christ appeared to eight young people in the remote village of Kibeho. Through these visionaries, Mary and Jesus warned of the looming holocaust, which they assured could be averted if Rwandans opened their hearts to God and embraced His love.” This definitely sounds intriguing!

***

These all sound so good! I don’t know which one to tackle first!! Not to mention, I already have quite a stack sitting on my shelf and downloaded on my Kindle!!

Have you read any of these books? If so, what did you think?

Five Favorite Uses for White Vinegar!

19 Aug

Keep Your Change

I love cheap and simple solutions!

About a year ago, I discovered the awesomeness that is white vinegar! I buy this stuff by the gallons now, because I use it so much! Here are my five favorite uses for white vinegar!

{1}

pancakes

If you are making a recipe that calls for buttermilk, but don’t have buttermilk on hand, just add a little vinegar to regular milk! The pancakes that I make every Saturday morning are made this way and they are fluffy and delicious! I like to substitute wheat flour for half the flour and mix in chocolate chips!

{2}

spray bottle

White vinegar, water, and a squirt of dish soap in a spray bottle is my favorite go-to multi-purpose cleaner! It’s excellent for glass and stainless steel, especially when cleaning with a microfiber cloth! I have a poor sense of smell, so the vinegar doesn’t really bother me, but my husband can’t stand the smell! Fortunately, it dissipates quickly!

{3}

drain

Baking soda combined with white vinegar makes a great de-clogger and deodorizer for drains. Just poor some hot water in after!

{4}

fruit

One part vinegar and three parts water makes a good rinse to clean the dirt off produce.

{5}

weeds

I haven’t tried this one yet, but I’ve recently heard that white vinegar can be sprayed on weeds instead of using costly chemicals to kill them.

***

I know there are so many more uses for vinegar, and I’m discovering more all the time! It is definitely a must-have staple in my house!

Happy Tuesday!

five-favorites-moxie-wife-1

Be sure to check out Hallie and the other ladies for the Five Favorites link-up this week!

Faux Granite Countertops with Acrylic Paints? Yup, I Did It!

30 Jul

DIY faux granite

I’ve been sharing recently about how Adam and I are getting our house ready to sell. One of the weak points of our house is the worn kitchen countertops. We’ve already put so much money into the rest of the house over the course of the past five years, that we decided that it isn’t worth it to replace the counters.

We didn’t want to give potential buyers an obvious reason to not consider the house, though, so I, somewhat impulsively, decided to update them in a kind of unconventional way. Thanks to several blog posts about painting faux granite countertops from other crafty individuals, like Tracy, Kelli, Kristi, and Kristy, who have done this rather successfully, I got up the courage to attempt this myself…

Before and After Faux Granite counters

Items Used:

-Painter’s tape
-1 Quart Kilz Primer (only used about 1/4 of it!)
-Foam brush
-4 inch foam roller
-4 inch paint tray (Nifty tip – line paint tray with foil , then throw away. No clean up!)
-Acrylic craft paint (I used 8 oz. black mixed with 2 oz. of Metallic black and 2 oz. gray and 2 oz. metallic bronze)
-Envirotex Lite (I used 40 oz. total)
-Small bucket/paint stirrer
-Large putty knife
-Plastic drop cloths/newspaper
-Vinyl gloves
-Plastic grocery bag and/or artist sponge(s)
-Paper plates

5 Steps to Faux Granite Countertops!

1. I taped off walls and the sink and primed the clean countertops with Kilz.

20130729-163024.jpg

2. I mixed 2 oz. of the Folk Art metallic black paint with 8 oz. of the black acrylic and rolled this color on as my base. I used a small foam brush to get around the sink and close to the walls. Prior to painting, I made sure to cover the cabinets with plastic drop cloths, which was especially important for step #4.

20130729-163036.jpg

3. Then, the fun part – sponging on the paint! Using a wadded-up plastic grocery bag, I lightly pounced the gray acrylic randomly over the surface. I then added black. I repeated this process with the same colors again. I started using an artist sponge with the black so it covered better. (I wanted a primarily black countertop with a marble-y look.) I used a small artist sponge and sparingly dabbed some of the metallic bronze paint. I used very little of the paint in this bottle. I sponged over all of the colors again with black and added a little more gray in some areas to add some contrast.

Giani Granite has some good tutorials on how to sponge on paint. I agree with them that adding on another layer while the previous color is still wet, gives the counters a more realistic, dimensional look.

20130729-163046.jpg

4. After letting the acrylic paint dry for at least an hour, I poured on the Envirotex Lite. I spread it over the countertops with a large putty knife. It was easier, and harder, than I thought to do this step. It was easier to spread than I thought, but it was harder to make sure every surface was covered evenly. I found a couple small patches near the walls that I had missed while doing this at 1:30 AM! This had to cure for at least 3 days before using. It’s also recommended not to set small appliances back on the countertops until after one week. We’re almost there! I can’t wait to have full functionality of my kitchen again!

This is definitely high gloss stuff! It brought out the colors and the subtle shimmer in the black paint instantly! I really love the overall look, but the high gloss emphasizes mistakes, too!

20130729-164015.jpg

5. After the sealer cured, I removed the painter’s tape. I had my husband help with a box cutter because the Envirotex made it difficult to remove the tape evenly. I mildly freaked out after the tape was removed, but after spending a couple hours touching up the walls with a little paint and a small brush, the finished product was MUCH better!

DIY Faux Countertops

Not a bad upgrade for a total cost of about $60! I bought the Envirotex at Michaels with a 40% off coupon. It typically runs about $30 for 32 oz. I also scored some of my acrylic paints at Michaels for 34 cents! They were on sale for half off last week! I probably could have spent less if we had already had some basic supplies on hand, but I needed a 4″ roller, plastic drop cloths, and vinyl gloves, etc. The gloves were a must! The Envirotex is sticky and it kept all the paint off my hands while sponging! I probably went through like five pairs during the whole process!

So, was I completely crazy to do this? At various times I thought I was, but overall I’m happy with how my countertops turned out!

Keep Your Change

This article is part of my Keep Your Change series! For more money saving posts, click here!

10 FREE, Useful Blogging Resources!

9 Jul

20130708-222517.jpg

If you’ve visited my blog before, you probably know that I like to save money (and, honestly, who doesn’t?), so I’ve decided to share some of the FREE blogging resources that I have found!

Over the course of the past year or so, I have gathered some great information and resources in regards to blogging. I’m constantly evolving as I learn more about websites, writing, and networking.You are likely familiar with many of them, but hopefully there will be one or two on this list that will be new and helpful to you! Please contribute your favorite free/cheap resources below!

First of all, pictures are a must when blogging, so some ideal places to obtain FREE stock images include:

On a side note, if you want quality royalty free images to use/tweak for a header or other purpose, you can purchase photos inexpensively at Can Stock Photo. Unlike other stock photo sites, you can purchase images individually without buying a credit package.

Whether you are designing your own website or want to edit photos, add fonts, or create graphics, you’ll likely need quality editing software. Guess what? You don’t need to invest in Photoshop! Enter these FREE photo editing options:
  • GIMP – I discovered the GNU Image Manipulation Program when I was having difficulty downloading the trial version of Adobe Photoshop for a web design course. I started doing some research online and found this great program! It is easy to download and several tutorials are available, since there is a great community involved with this program. I’ve been able to do pretty much everything on there that can be done in Photoshop!
  • Pixlr – I haven’t used this free online photo editor yet, but it looks to be able to do a lot of what Photoshop does, as well. It also has a mobile app that can be downloaded for free, too!
  • Recite – Easily turn a quote into an image via this site. You can share it on your blog and also various social media sites.
FREE Email options:
  • Zoho Mail – The Lite version is free if you need a professional business email for your domain.
  • MailChimp – Free way to manage e-newsletters for fewer than 2,000 subscribers.

(I’m not quite at the point to need these options yet, since I’m still on a WordPress.com site and haven’t launched my new project yet, but I’m sure these options will come in handy in the future.)

FREE Training Courses/e-books:

It’s amazing what you can get for free when you pay attention! There is no shortage of information online, that’s for sure! If you’re interested in expanding your blog, check out some of these helpful resources:

  • Jeff Goins’ Free 12-Week Blogging Course – I stumbled upon this several weeks ago when Jeff was promoting it on Twitter. I’m actually in the middle of the course right now! I’ve read Jeff’s book, Wrecked, and I’m a big fan! He has things in the right perspective and is very relatable and encouraging! Also, he’s a fellow Nashvillian!
  • How to Make Money Blogging by Crystal Paine of Money Saving Mom – This e-book is based on Crystal’s How to Make Money Blogging series. I skimmed through some of her posts and there are several helpful tips about the work it takes to grow a blog in order to make a profit.

Of course, these are just two examples of the endless free content that is available in regards to blogging tips. There are entire blogs just about blogging! So much to learn, so little time!

Happy blogging!

Keep Your ChangeThis article is part of my Keep Your Change series. For more money-saving posts, click here!


5 FREE Father’s Day Printables!

11 Jun

Keep Your Change

I’m always on the look-out for cute, easy, and inexpensive sentimental gifts! While searching for Father’s Day ideas for my husband from our two little girls, I found some great printables that I’ll be holding on to for future years! Below are five of my favorite FREE Father’s Day printables that I stumbled upon online! (And since they’re free, this is a perfect post for my Keep Your Change series!)

{1}

Father’s Day Photo Collage & Printables from Positively Splendid 

Detailed step-by-step instructions listed. There are also additional names to choose from instead of just Daddy.

{2}

Free Download: A Book For Dad from Eighteen 25

All that is needed to create this project is a 4×6 photo book, ribbon, and a stapler! BONUS: There’s also a downloadable book for Grandpa, too!

{3}

Father’s Day Handprint Tree 2013 from The Crafting Chicks

I’ve seen this one all over Pinterest, so you may have already, too!

{4}

Father’s Day Subway Art from Pink Ink Doodle

The printable is available in 8×10 and 5×7 sizes.

{5}

Father’s Day Questionnaire Printable at The Crafting Chicks

~

Five Favorites, hosted at MoxieWife.com

I’m also linking up again with Hallie this week! Be sure to check out everybody else’s five favorite things and join up, too!

Consignment Sale Tips for Beginners

28 May

I’m so excited to have Lisa Hadro of Joie de Vivre guest posting today to share her consignment sale advice! I’m looking forward to giving consignment sales a try!

Consignment Sale Tips for Beginners

Many thanks to Stefanie for inviting me to guest post, and allowing me to add my 2 cents to her helpful series, Keep Your Change! If you haven’t read her series before, you should check it out! You’ll find creative ideas and thrifty spending tips.

My husband and I have two little girls. Our first-born arrived in August of 2011, and since then we have learned a thing or two along the way including: A. babies stain their clothes a lot, B. they grow out of sizes faster than you can organize all the cute clothes, and C. with each stage of child development you graduate to different toys/ baby equipment. That left me wondering how does one manage all that turnover? My older sister always raved about how great consignment sales were for finding kids’ clothing and paraphernalia on the cheap, but in good condition, so I started looking around for sales in my area. Now, I don’t consider myself a consignment sale expert, but I’ve picked up a few tips along the way to share with beginners. 😉

1.Keep your ears open.
Most consignment sales advertise online or local papers, so they should be easy to find. Some even have email lists, so you can get alerts when sales are coming (the one I regularly attend is held quarterly, so I’m on the lookout for the email each season).

2. Be familiar with your brands.
You don’t want to pay several dollars for a pair of secondhand toddler pants from say, Wal-Mart, when you could buy them new for just a dollar or two more. On the other hand, consignment clothes from Gymboree or Janie and Jack? Sign me up! I love finding  brands like that secondhand since they are pricey bought in-store and good quality clothes.

FYI- Some sales have a general pricing guideline for consignors, but others leave it up to the consignors to chose their price-point. I realized this after attending one sale where a toddler dress was priced for twenty-some dollars, when most things were priced much less! I checked the website and found they allow consignors to price however they want.

3. Have a plan of attack.
Seriously. These sales can get more than a little crowded and busy. I’d advise to know which areas you really want to scour (toys, books, maternity, furniture, etc.) and head there first.
Which leads to…

4. Make a list.
Know what you’re looking for! Consignment sales have massive inventory of everything from sippy cups to big ticket items like strollers and cribs. The first time I went I was blown away by all the inventory and thought, “I can buy EVERYTHING for the baby!”. Soon I realized I had no way to transport large items, and some baby gear would get more mileage if purchased new.

But my mom babysits a lot for the grandkids in our family (all are under 6), so she decided it would benefit her and my dad to purchase things like toys, bumbos, and booster seats consigned.

5. Know the ins and outs of the sale.
What form of payment do they take? Do they allow strollers? Is it held in a place that can accommodate kids? Some sales open to new moms a day earlier than they open to the public (you probably have to  pay for a pass, but it can be worth it!).

6. Check clothing for stains, tears, holes, etc.
The items are usually all gently used (or even new), but it never hurts to double check.

7. Wait for the sale’s sale day.
If you’re just looking for a few general items of clothing or kiddo paraphernalia, some sales may have a half price or even dollar day towards the end.

That about wraps it up! If you have any other tips for navigating consignment sales, I’d love to hear them!

Lisa Hadro


Thanks, Lisa, for sharing your helpful tips!

Lisa blogs over at Joie de Vivre about the fun and craziness of life with her husband and two little girls and things she enjoys, like shopping for little girl clothes.


 ~

This post is part of my Keep Your Change series.  For other money saving posts, click here!

Keep Your Change

5 Ways I’ve Learned to Save on Baby Necessities!

5 May

Baby

It’s no secret that babies cost money, especially first borns! Fortunately, hand-me-downs can help lessen the blow financially when subsequent children come along! And, of course, breastfeeding and pumping saves a lot of money! As a mother of two little girls, I have learned some additional ways to cut costs and thought that I’d share! (I know that there are many savvy, domestically-talented women out there who probably have their own great ideas, so if you are one of them, please comment with your tips below!)

1. Diapers

Anybody who has had a baby knows that a box of diapers does not last long! I applaud cloth-diapering mommies out there, but I’m not one of them and I knew that my husband (who is with the girls quite a bit) would never consider it! For those of us who go the disposable route, I discovered an easy and usually less expensive option when my second daughter was born – Amazon Mom. I tried it when it when the program first started and it was great to be able to get diapers delivered straight to my door at 20% off! It was one less thing that we had to worry about running to the store to get! I was able to use Pampers on my daughter for the full first year because of the great price!  (My trial ran out after one year.)

2. Wipes

Just like diapers, wipes can be gone in a flash! Especially, on some of those 5+ wiper-diapers! You know, the real fun ones to change! Anyway, I have discovered since using coupons that there are a few times during the year when quality brand-name wipes can be bought for FREE when on sale with a coupon! At various times, Kroger has discounted Huggies and Pampers to $.99 with a Kroger’s Plus card. Combine that with a $.50 off one package coupon that doubles to $1.00, and that makes them FREE! The good news is that even when Huggies aren’t on sale, a coupon can bring the price down to $.99 for a package of 64-count wipes, which is still a pretty good deal! I always stock up on extra wipes coupons, especially when there is a sale!

Speaking of coupons, keep an eye out for diaper cream and baby wash coupons, as well, to avoid full price! Even better, use with a sale to pay a fraction of the price!

For more about shopping with coupons, click here!

3. Store-bought Baby Food

Wait, I know what you’re thinking! Isn’t it cheaper to make my own at home? Yes, and no. I’ll get to that one in number 4, though. In my experience, I have been able to buy organic baby food for as low as $.07 per jar! When you are able to pay as low as $.07, it’s definitely worth it to stock up on some jars for when you’re in a pinch and running low on homemade baby food! I once was able to get 18 jars for about $1.60!

It’s a good idea to join brand-name companies’ mailing lists, so you will get regular emails with printable coupons! Often, Coupon Network will have baby food coupons, as well. 

4. Homemade Baby Food

Overall, making your baby’s own food is less expensive and healthier. Using in-season produce is ideal, because it is less expensive. It can seem overwhelming at times, though, when trying to make everything fresh, so I often blended cooked frozen veggies or canned fruit (in 100% juice) to make things more manageable when pressed for time.  BONUS: These things can also be bought at a reduced price with coupons!  The blended food can then be poured into ice cube trays and the frozen individual servings can be popped into freezer bags to save for future meals!

5. Frozen Treats

I mentioned my love for popsicle molds in a recent Five Favorites post. When eating canned fruit, I never wanted to waste the juice, so I’d pour it into a popsicle mold for another time. This is perfect for teething babies and toddlers! Who doesn’t like popsicles anyway?!

Another idea, is to buy a pack of kids’ yogurt when there’s a huge manager’s discount (or you have a sale/coupon)! Even though the expiration date is soon, you can stick spoons in each container and pop them in the freezer! Quick frozen yogurt pops! Be prepared for a mess, but it’s a fun treat!

"C" with Yogurt

Don’t forget to share  your own great tips to save money with a new baby in the home!

Keep Your Change

This post is part of my Keep Your Change series. For more money saving posts, click here!